How to Install a Combustor in a 5383 Pulsed Flame Photometric Detector
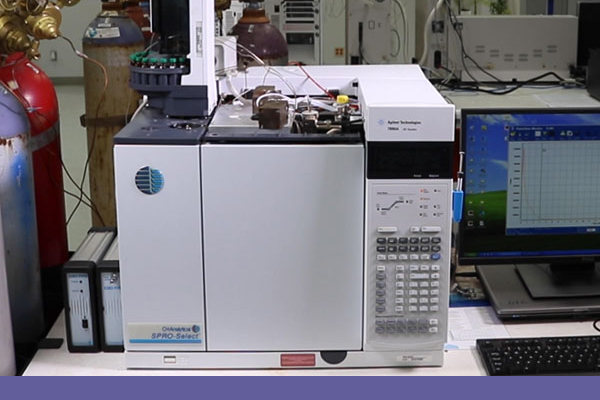
The OI Analytical Model 5383 Pulsed Flame Photometric Detector (PFPD) uses superior sensitivity and increased selectivity to easily and accurately analyze sulfur, phosphorus, and 26 other elements. The unique capability to obtain simultaneous sulfur and hydrocarbon chromatograms from a single detector sets it apart from other sulfur detection technologies.
Widely used in laboratories to analyze sulfur species and total sulfur levels in liquid-phase petrochemicals, you will also find the Model 5383 hard at work analyzing organophosphorus pesticides, pharmaceuticals, flavor, and fragrances, beverage-grade CO2, chemical warfare agents, and more. So, what happens when you start getting high hydrocarbon emissions or other irregular emissions? No need to panic. It may be that you only need to install a new combustor - which can be done in a few easy steps. This article will serve as a step-by-step guide for reference!
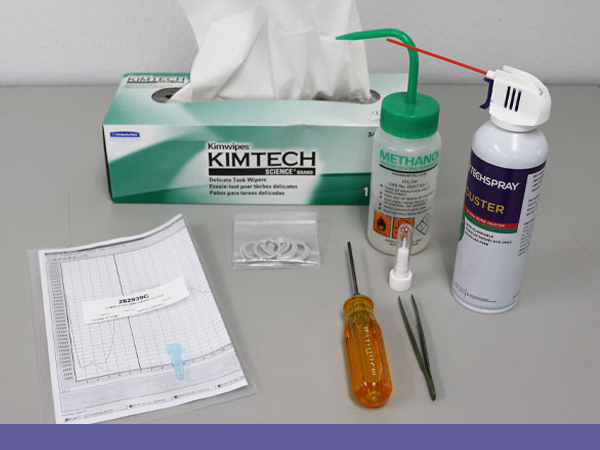
What to Have On Hand
When you receive your PFPD there is a start-up kit included with the detector. You will see multiple tools necessary for proper combustor installation. See below to what to have on-hand to replace a combustor:
- Screwdriver
- Teflon coated forceps
- Methanol
- Combustor extractor tool
- Aluminum crush washers
- Combustor
- Lint-free cloths
- Spray duster
The Procedure:
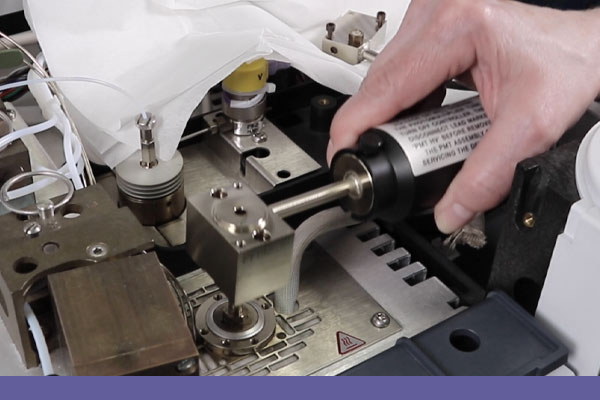
Step 1: The first action in replacing the combustor is to turn off the 5383 controller, the GC oven, detector, and inlet temperatures, as well as the gases. It usually takes 30-45 minutes to cool down. After the instrument is cool, and okay to touch, place a clean, lint-free cloth on the top of the GC.
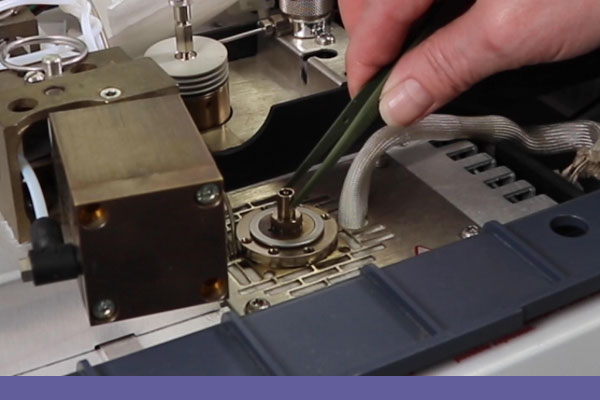
Step 2: Next, you will unscrew the screws located on the detector cap. Alternate between the two screws to avoid galling the screws and detector.

Step 3: Remove the detector cap and place on the clean wipe.
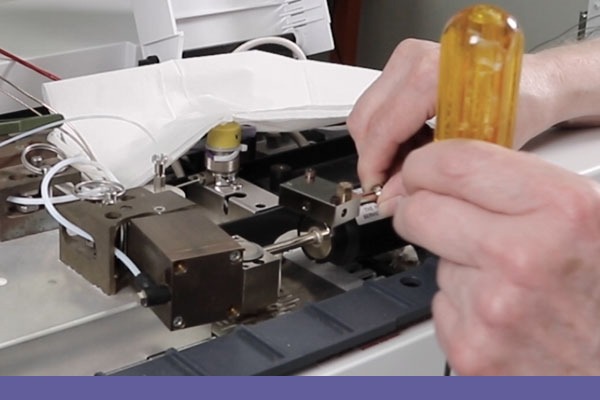
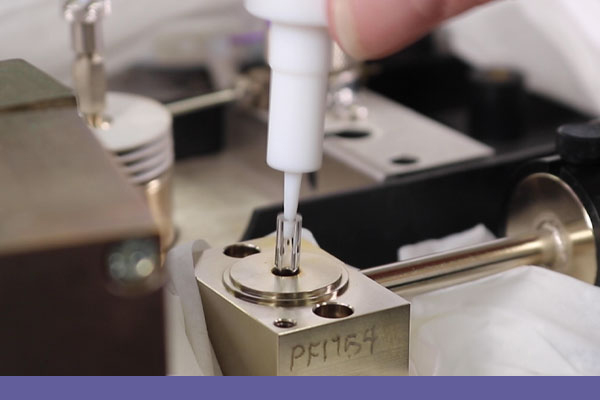
Step 4: In your startup kit you will find a pair of forceps. Rinse the forceps with methanol and use them to remove the aluminum crush washer.
Step 5: Discard the washer into the trash. It’s important to note that the washers should not be reused.
Step 6: Remove the screws from the detector body and place the body on the wipe with the detector cap.
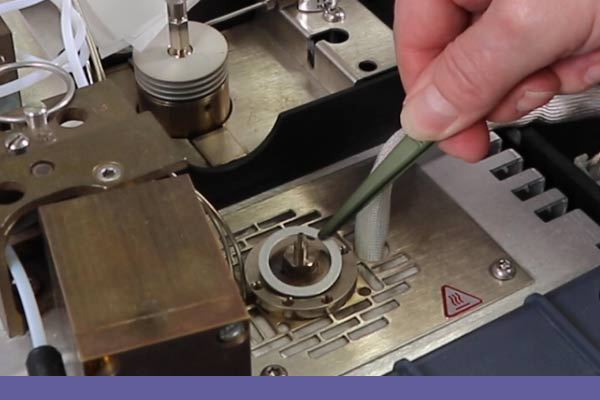
Step 7: Rinse the combustor extraction tool which comes in the start-up kit with methanol, and remove the combustor. Use the forceps to remove the combustor sleeve. Inspect the base for glass and column fragments and use a spray duster to blow out any debris if necessary.
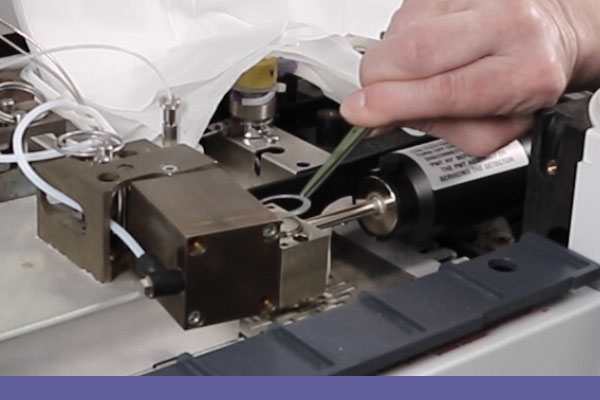
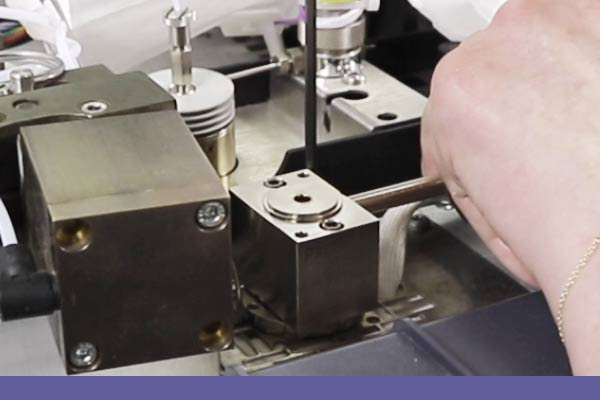
Step 8: Put the sleeve back on the combustor support and place a new aluminum crush washer on the detector base. Now install the detector body. Make sure it is aligned squarely when you install.
Tip: Check where the combustor goes in to make sure the body is centered. If the alignment is off it can be difficult to slide the combustor in. Tighten the screws going back and forth.
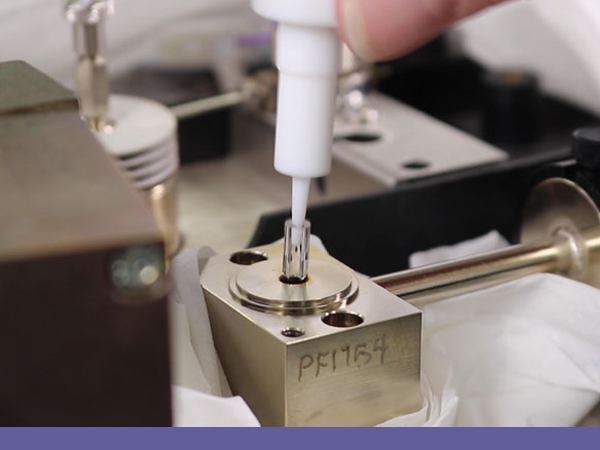
Step 9: Open the plastic container which contains the new combustor and use the extraction tool to remove the combustor keeping the same orientation.
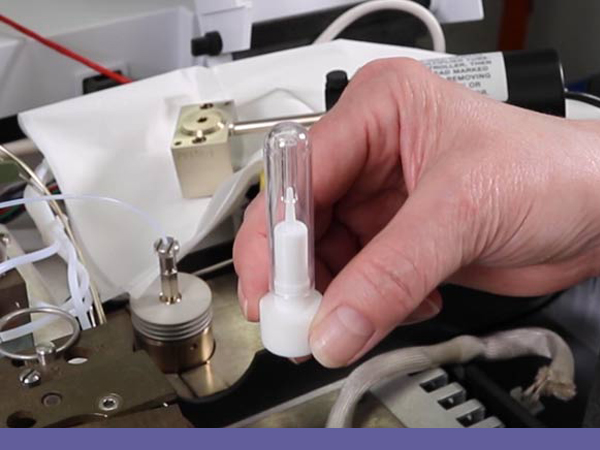
Step 10: Carefully insert the combustor into the body of the instrument.
Note: If the combustor is dropped, it will have to be discarded. If the combustor does not easily slide in, remove it and loosen the screws and realign the body. Do not loosen and tighten the screws with the combustor installed because it will likely break. When the combustor is properly installed it should drop about 2mm below the surface of the body.
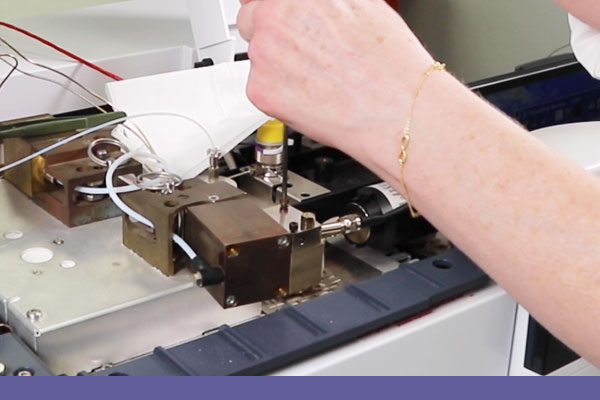
Step 11: To finish the installation, place a crush washer on the body and install the cap. Be sure to alternate tightening the screws.

Step 12: After the screws are tightened, you can turn the oven and detector temps on as well as the gas flows. Wait for the detector to reach around 150 degrees and turn the controller on. You will hear a pop as the PFPD starts pulsing. Don’t worry if the popping and emission don’t seem right at first thing because the system needs time to heat up and stabilize. We recommend allowing a minimum of two hours for proper stabilization. It is best to stabilize overnight if time permits.
Step 13: Check the sulfur emission and adjust flows if needed. You can reference the Quick Reference Guide if you have any questions, or call us anytime.
OI Analytical 5383 PFPD Training Video

Our technology experts are available to help with everything from instrument selection to data management.
We are now offering free virtual consultations for your next project! Whether you are renovating your lab, or need a single instrument, our dedicated team of application engineers and experts identify the best technology for your needs. Book a free virtual consultation with our experts!